skip to main |
skip to sidebar
CHAPTER 1
COMIC BOOK
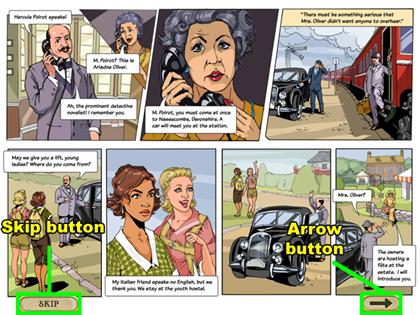
- When the game begins you will enter a comic book dialog sequence.
- Move your mouse to reveal the dialog buttons at the bottom of your screen.
- The dialog buttons on the first page are different from the buttons on any other page.
- The first page includes a skip button, and a right arrow button. The skip button will allow you to skip the entire dialog sequence, and the right arrow will take you to the next scene in the dialog.
- With any other page there will be a left arrow button, and a continue button. Use the left arrow button to revisit the previous page in the dialog, and use the continue button go to progress through the dialog.
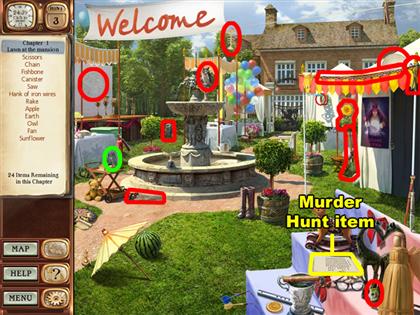
- After the comic book dialog, you will arrive at the map screen. This is where you will choose which scene to visit.
- The Lawn is the only scene available right now, so click on the only highlighted area of the map to advance.
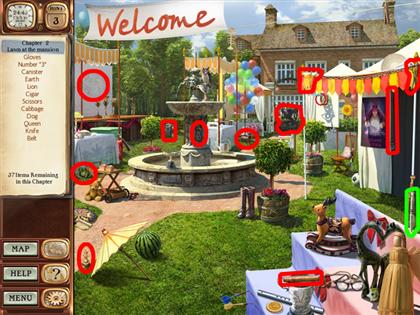
LAWN
- Collect the hank of wires to reveal your first clue card. It is located near the center of the left side of this scene. These clue card items are highlighted in green.
- After collecting all of the items on the item list, you will receive your first clue note. Clue notes help you to find clue items that are hidden in the scene.
- Clue notes are displayed under your item list. This clue note says “find the murder hunt instruction sheet”.
- Collect the instruction sheet in the bottom right corner of this scene.
- After collecting the clue item, collect the shimmering photograph that was hidden underneath it.
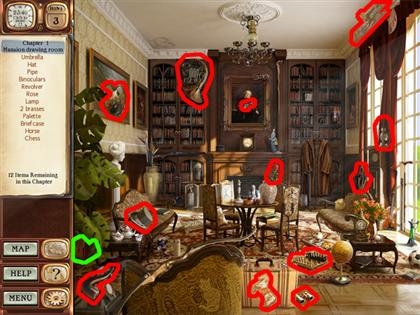
DINING ROOM
- After returning to the map screen, click on the dining room location to visit this scene.
- Collect the brief case located in the bottom left corner of this scene. This specific item will reveal a clue card.
- Collect the remaining items to advance to the Bonus puzzle.
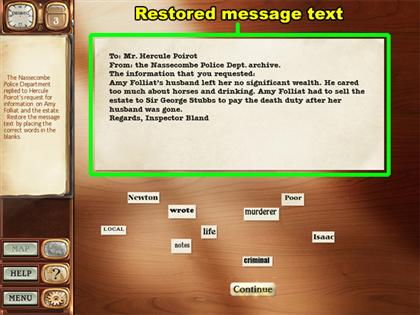
BONUS PUZZLE
- Restore this message text to move on to the next chapter.
- Place the words in the bottom half of your screen into the blanks of the message text.
- When the word you use to fill in a blank is correct, it will snap into place like a puzzle piece.
- When the word you use is incorrect, it will be returned to the word pile.
- The restored message reads:
To: Mr. Hercule Poirot
From: the Nessecombe Police Dept. archive.
The information that you requested:
Amy Folliat’s husband left her no significant wealth. He cared too much about horses and drinking. Amy Folliat had to sell the estate to Sir George Stubbs to pay the death duty after her husband was gone.
Regards, Inspector Bland.
CHAPTER 2
LAWN
- Collect the knife above the bottom right corner of this scene. This item has a clue card item in it.
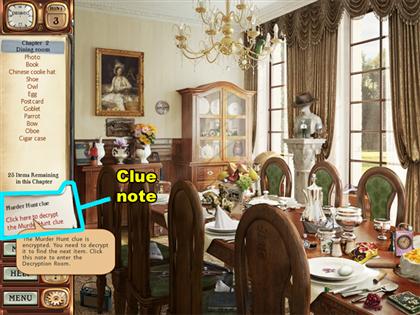
DINING ROOM
- Click on the clue note below your item list.
- Whenever the clue card text is red it means that you need to decrypt the clue. After clicking on the clue card, you will enter the decryption room.
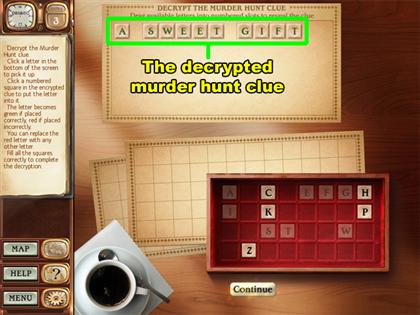
DECRYPTION ROOM
- Decrypt the murder hunt clue by placing the letters into their correct cells.
- Click on a letter from the bottom of your screen to pick it up; click again to place it into a cell.
- When you use the correct letter will turn green; otherwise the letter will turn red.
- Each empty cell is numbered, and sometimes multiple cells have the same numbers. In this case using a letter on one of these cells will cause the other cells to inherit the same letter.
- This decryption for this clue is “A SWEET GIFT”.
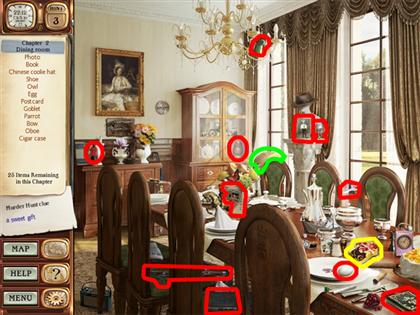
DINING ROOM
- Collect the Chinese coolie hat in the center of this scene. This item has a clue card within it.
- Collect the clue item near the bottom right corner of this scene. This clue item looks like small container of candy. There is always a shimmering picture hiding behind a clue item.
- Collect the picture that was behind the container of candy.
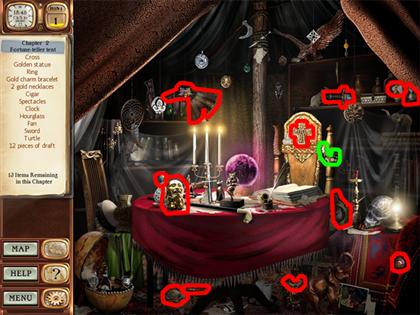
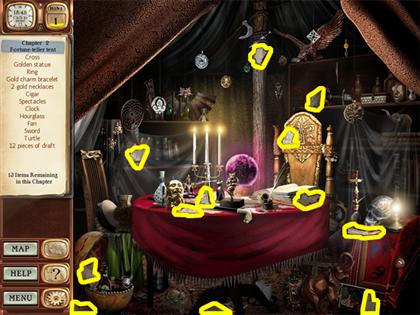
FORTURN-TELLER TENT
- Collect the gold charm bracelet to the right of the center of this scene. This item will reveal a clue card.
- Collect all 12 pieces of the draft.
- Two are in the bottom left corner of this scene.
- One is near the center of the left side of this scene.
- Two are left of the center of this scene.
- One is at the bottom center of this scene.
- One is near the top center of this scene.
- Two are to the right of the center of this scene.
- One is above the center of the right half of this scene.
- One is in the bottom right corner of this scene.
- One is above the bottom right corner of this scene.
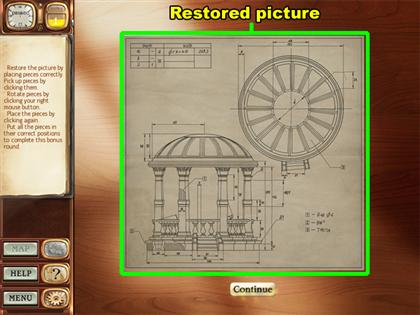
BONUS PUZZLE
- Restore the picture by placing the pieces together correctly.
- Left-click a draft piece to pick it up and Left-click again to set it somewhere.
- Right-click a draft piece while it is picked up to rotate it.
0 comments:
Post a Comment